 This is a very practical stitch for joining already cut pieces of fabric. Thanks to its use, the edges of the pattern can perfectly adhere to each other, before we sew them permanently. It's actually a kind of basting on the right side of the fabric. Admittedly, the use of this stitch uses slightly more fabric, but the job is neatly and professionally finished. You will need an iron to fix the seam made in this way.
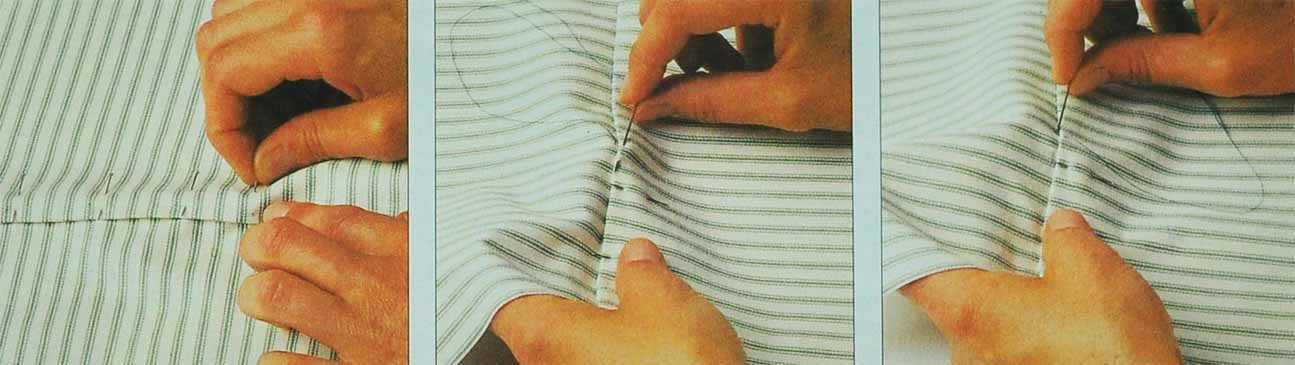
1. LIST OF DESIGN PARTS – Place the cut parts right sides up, in this way, that their edges overlap. Fold the edge of the pattern at the top underneath 2 cm (or more, if the material is thicker). We press the plant, put together the parts of the pattern and fasten them with pins.
2. START STITCHING – We thread the needle with the thread for basting. We fix the end of the thread on the seam line. We make a stitch of length 1 cm along the top, the assumed part of the pattern.
3. FORMING THE LADDER – Next stitch, also length 1 cm, we make on the lower part of the pattern. Continue stitches alternately in the upper and lower part of the pattern, creating a "ladder”. After basting is finished, fold both pieces of fabric right sides together, we make the right seam, then the "ladder” we rip it off.