Decoration – upholstery of the door with wood
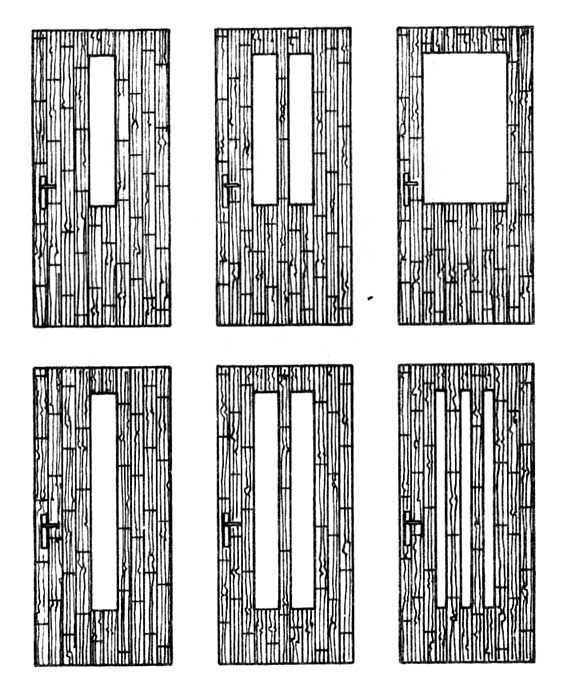
Covering the entrance door with thin slats
The entrance door is lined with wide laths 45 mm, max. 50 mm and a thickness of 10-12 mm (drawing).
The slats can be joined with your own or a foreign tongue. They are nailed to the door frame in a vertical arrangement or in various geometric shapes.
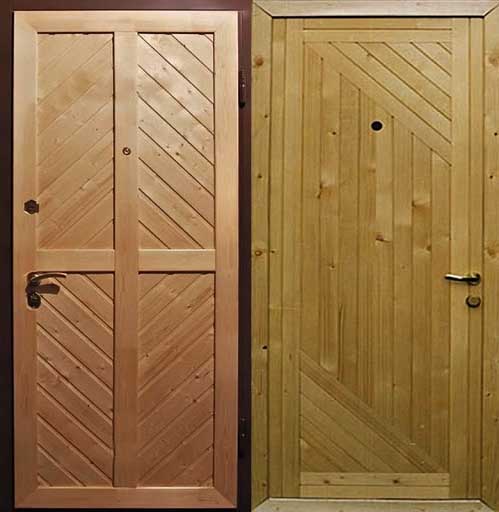
Lining the entrance door with conical boards.
Another lining of the entrance door can be conical boards (drawing).
Drawing. The shape of conical boards for lining the entrance door.
This type of decking gives the impression of braid. It is easy to make and assemble, and aesthetically interesting. This is caused by a diagonal cut in two directions and a different pattern of the wood that is created in this way. Both new and old doors can be lined with these friezes, veneered or painted (after removing the paint). Old door too, with damaged veneer, can be lined with conical friezes.
![]()
Drawing. The structure of the entrance door lined with conical boards: 1 - conical friezes, 2 - jamb, 3 - frame.
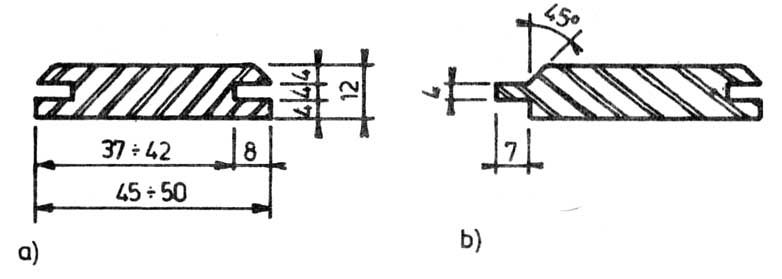
The friezes are glued over the entire surface of the door, as long as there is no need to create fireflies, or only on part of the door surface. The pane fixing strip is formed by friezes on one side and friezes on the other, internal, profiled strip (drawing).
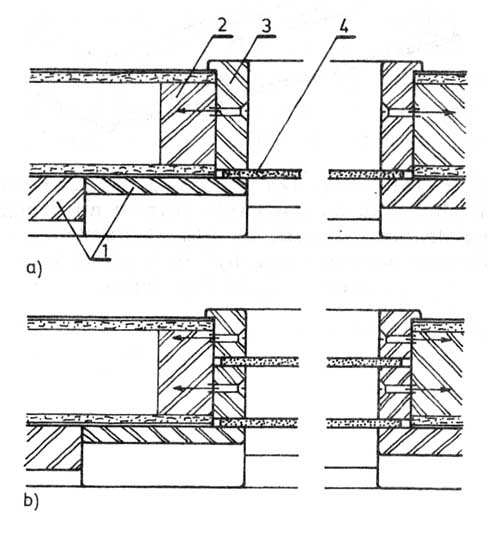
Drawing. Window glazing: a) section of simple glazing, b) cross-section of double glazing; 1 - conical friezes, 2 - an insert glued between the plates, 3 - strip with a notch, 4 - glass.
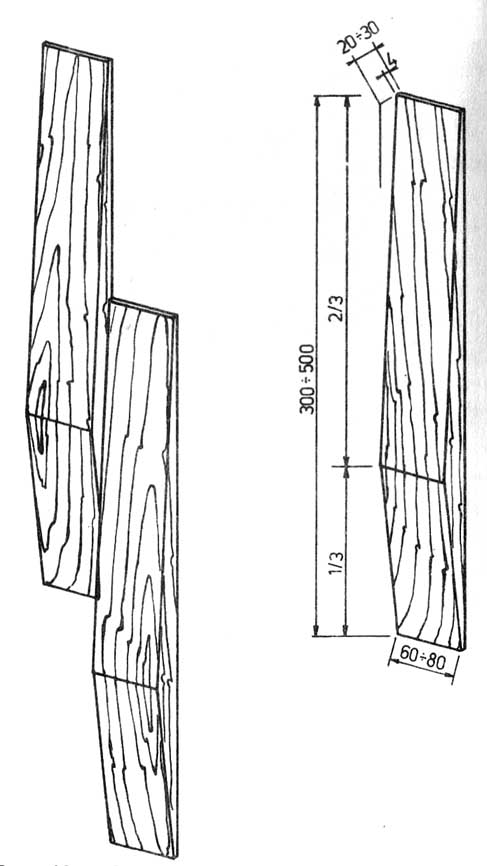
The production of friezes is tedious, mainly due to the exact and uniform miter. First it is processed (stream) rectangular boards 60-80 mm wide, 20-30 mm thick and 300- long 500 mm. The optimal dimensions of the boards are 65X25X400 mm. The cuts are made on a circular saw with the kerf height at least equal to the width of the frieze. In order to obtain the same cutting of all boards, two instruments are being prepared, according to the drawing, which are guided along a guide parallel to the saw blade of the circular saw.
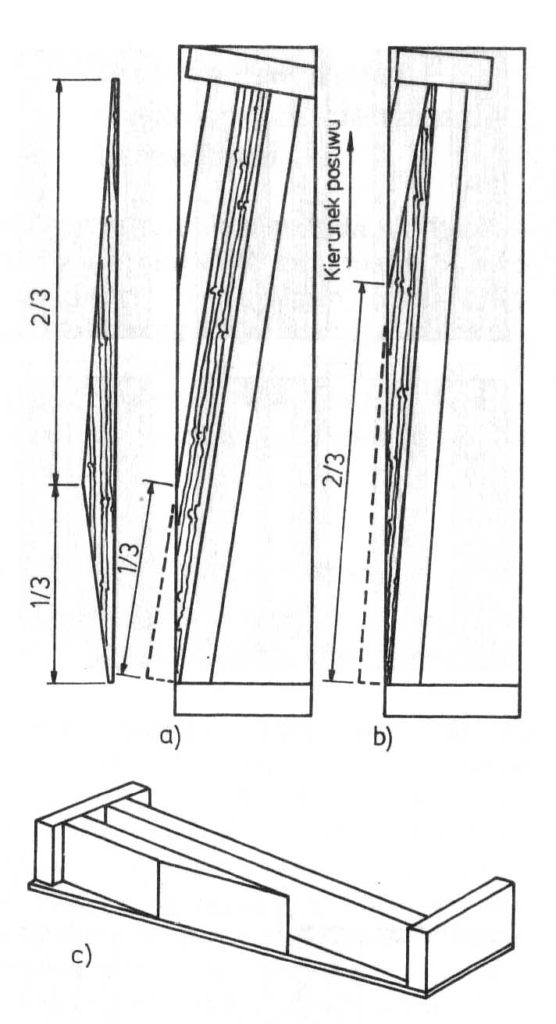
Drawing. Miter box for slitting boards on a circular saw: a) board cutting box on the short side, b) board cutting box on the long side, c) axometric projection of the miter box. Caution: cuts can be made from the half of the board length. Then the miter box may be one.
When specifying a miter, remember about 1 mm reserve for planing. Then the cut planks are planed on a planer set on a thin chip. Amateur, who has no experience with planing short workpieces, may choose a more laborious one, but a sure way - grinding on a belt or disc grinder. At the end of the processing, the boards are sanded on a belt sander, only along the grain. After all visible edges are rounded off, the boards are spray-coated.
The method of sticking conical boards is as follows. With the door closed, the outline of the door is made in the light of the frame. The door is then removed from its hinges, lays horizontally and at a distance of approx 10 mm from the door contour line, a simple wooden lath is fixed with the help of carpentry clamps. The first row of boards is glued to the batten. You can use polyvinyl acetate adhesives for gluing (np. Winilep A). Since these adhesives are water dispersion, they are applied pointwise in 2-3 places, in such quantity, so that when pressed, they form a circular stain with a diameter of approx 30 mm. The pattern of laying on solid doors and doors with skylights is shown in the figure below.